The Full Beginners Guide to Filling Your Own Capsules
Filling your own capsules may seem straight forward, but there are important things you should know before getting started. We’re going to run through those, and then discuss the best ways to make and store your own capsules.
Facts To Understand about Capsules

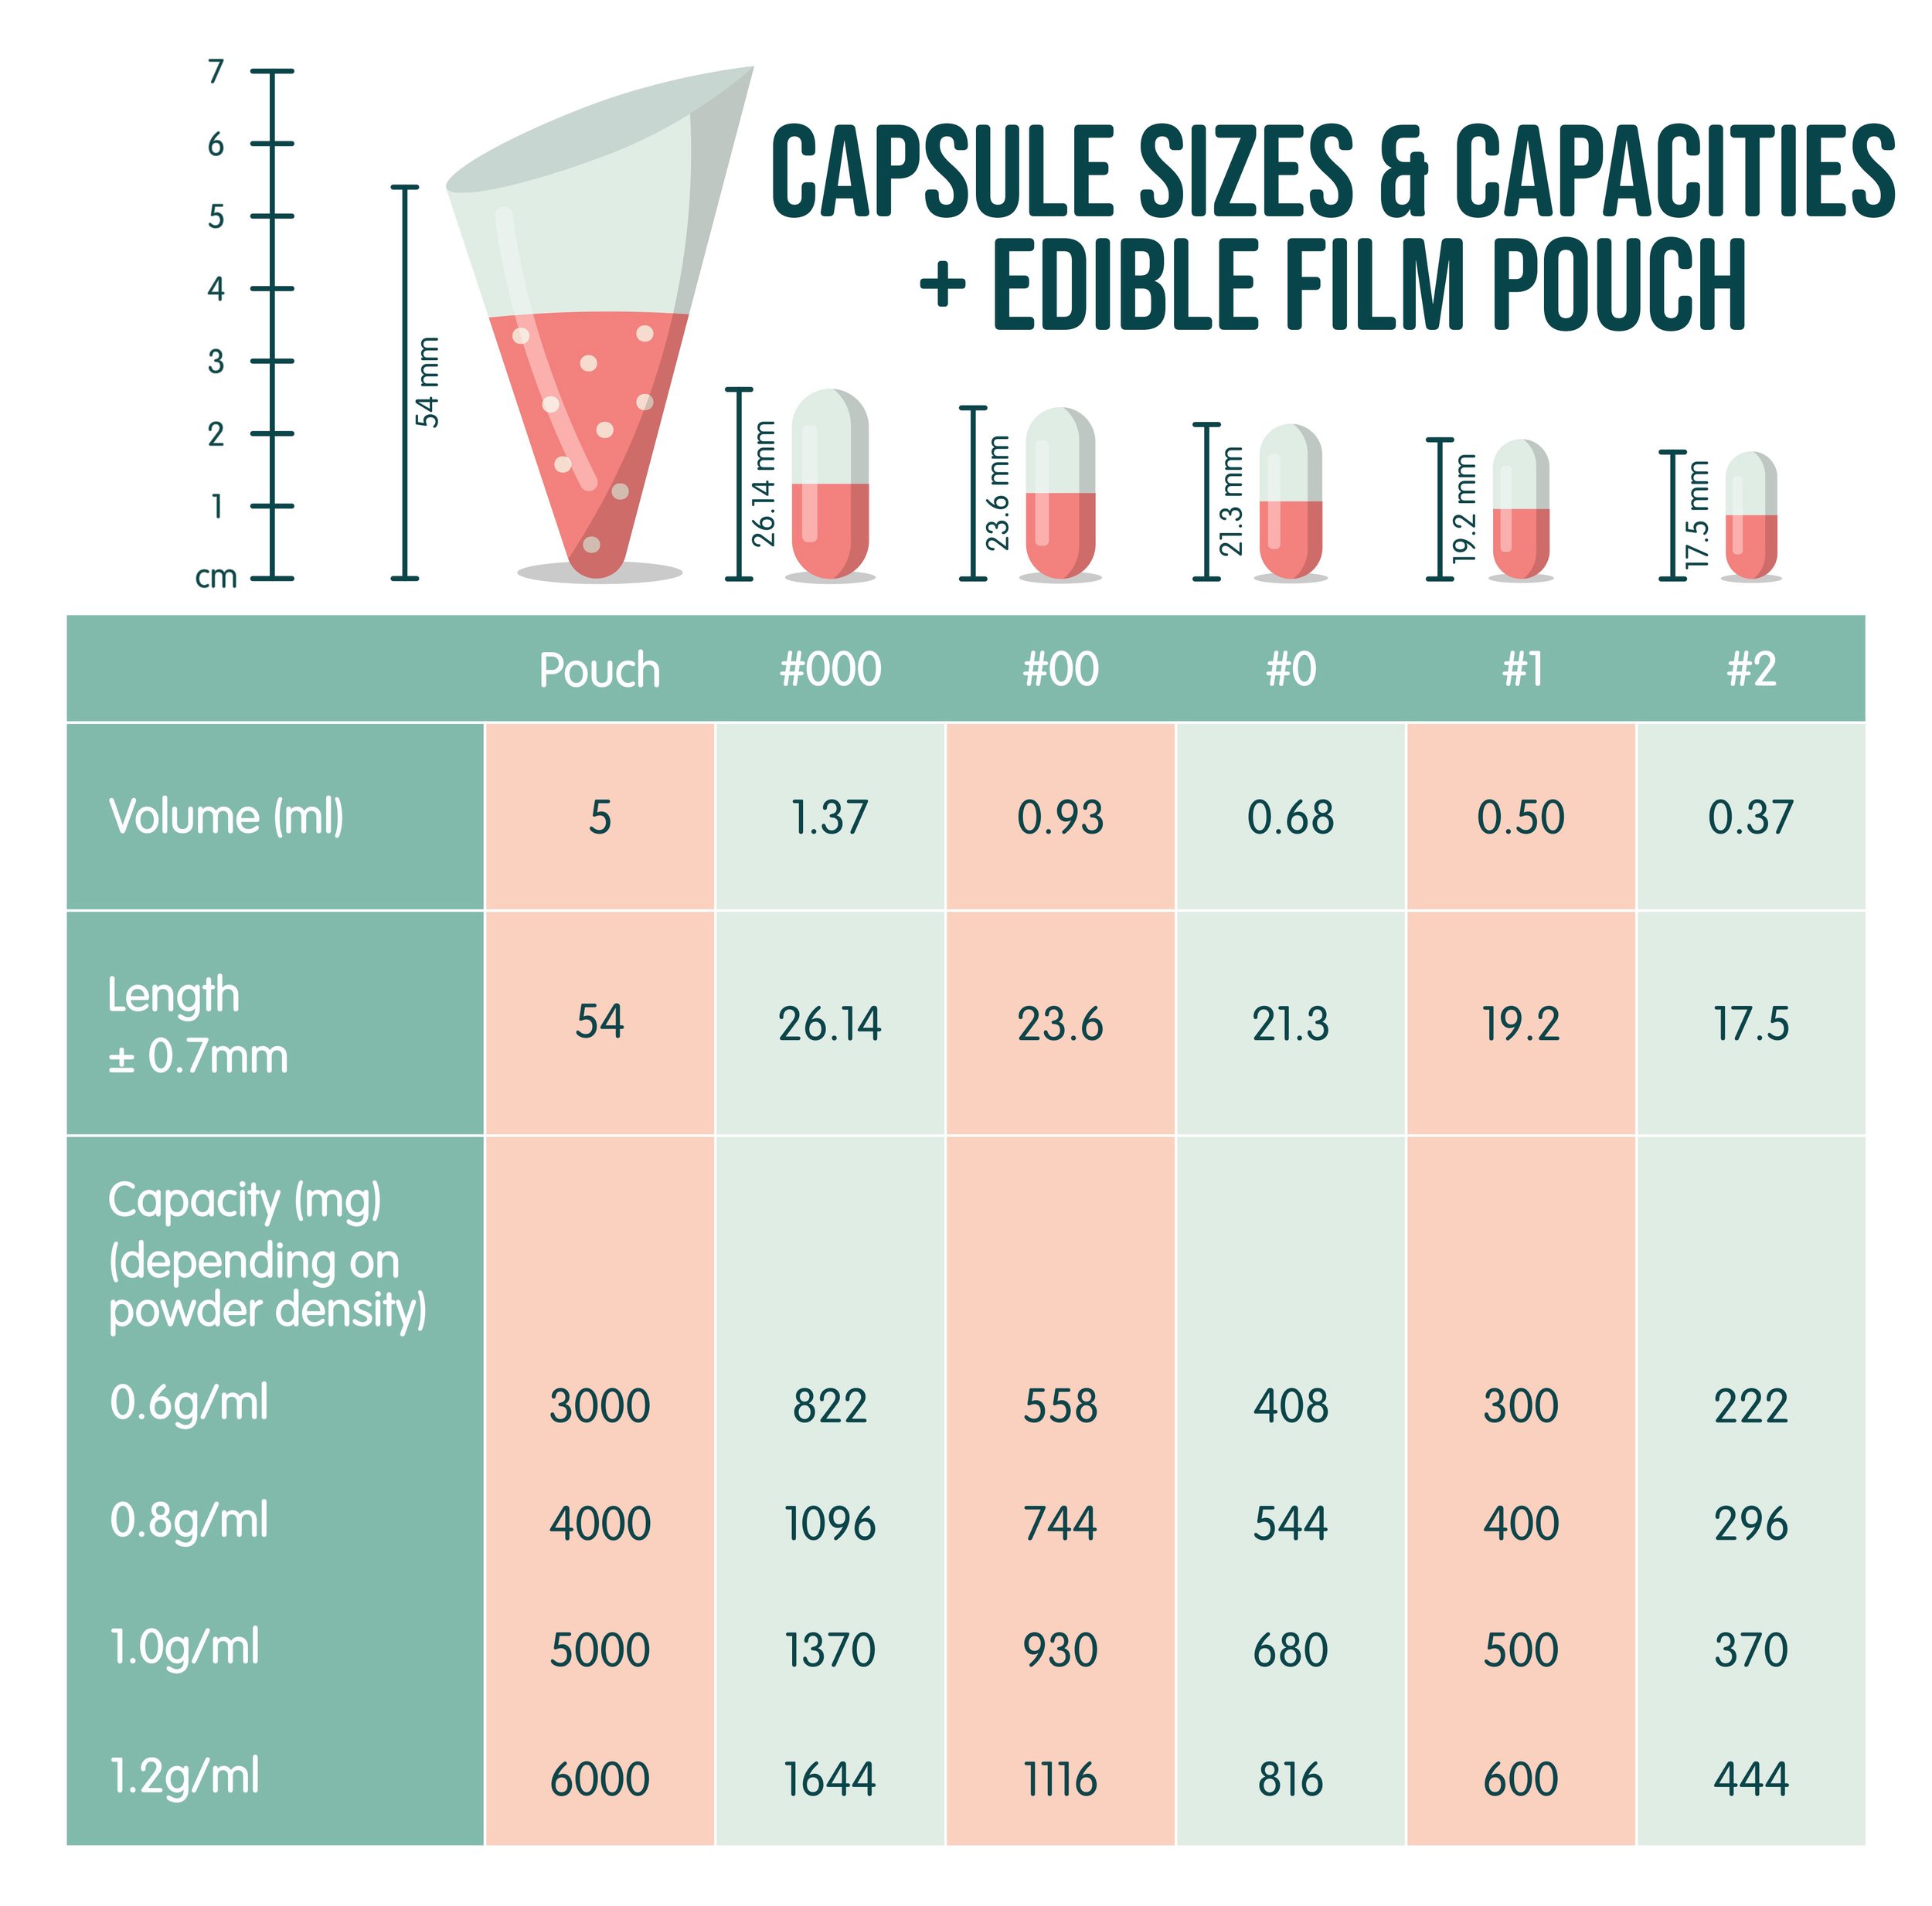
Common Capsule Size Comparison
Fact 1: There are 8 general capsule sizes:
Those sizes are: 000, 00, 0, 1, 2, 3, 4, and 5.
Oddly, as the numbers go down, the capsule size increases. So a size 000 capsule is the largest, and size 5 is the smallest. The most common capsule size is 00, and holds between 600 to 1100 milligrams in one.
Our graphic here shows the most common capsule sizes (000 - 1) next to a quarter for reference. This shows generally how much powder can fit in each one.
Later on in the article we have a graphic that shows more accurately how much powder can fit in each size based on different powder densities.
Fact 2: There are 3 basic types of capsules
Gelatin - These are most commonly made from the collagen of cows (bovine gelatin), but can also be made from pork (porcine) or fish. Our bodies are made up of about 50% collagen, and thus animal processing provides the gelatin needed to make these capsules.
Hypromellose - Hypromellose is short for hydroxypropyl methylcellulose, or HPMC. Normal cellulose is also known as plant matter (saw dust, for example). Therefore, it comes from plants and is vegetarian. But many don’t consider hypromellose to be vegan because they use a specific artificial process to modify it into hypromellose for making capsules.
Pullulan gum - Pullulan gum is a natural polysaccharide (carbohydrate) made from fermenting the fungus Aureobasidium pullulans. Because of the natural processing, these are considered true vegan capsules. And as such, they are typically a bit more expensive than the rest.
*Clear Versus Colored Capsules
Clear and Colored Capsules
Each of the above types of capsules can also come in a variety of different colors. Unfortunately, just like with pharmaceuticals, these colors commonly consist of artificial coloring and other chemical additives.
That’s why we recommend using only clear capsules with the cleanest ingredients (gelatin or pullulan). In fact, we advise against ever using colored capsules.
Each of the three capsule types work in the same way. But some can take longer to dissolve based on the manufacturer’s final thickness and processing. We’ve compared the time it takes each of the common capsules types to dissolve in a stomach environment in a short video clip.
Fact 3: Powders Come in all different densities
This means that if you fill the same size capsules with different types of powder, they won’t be holding the same amount.
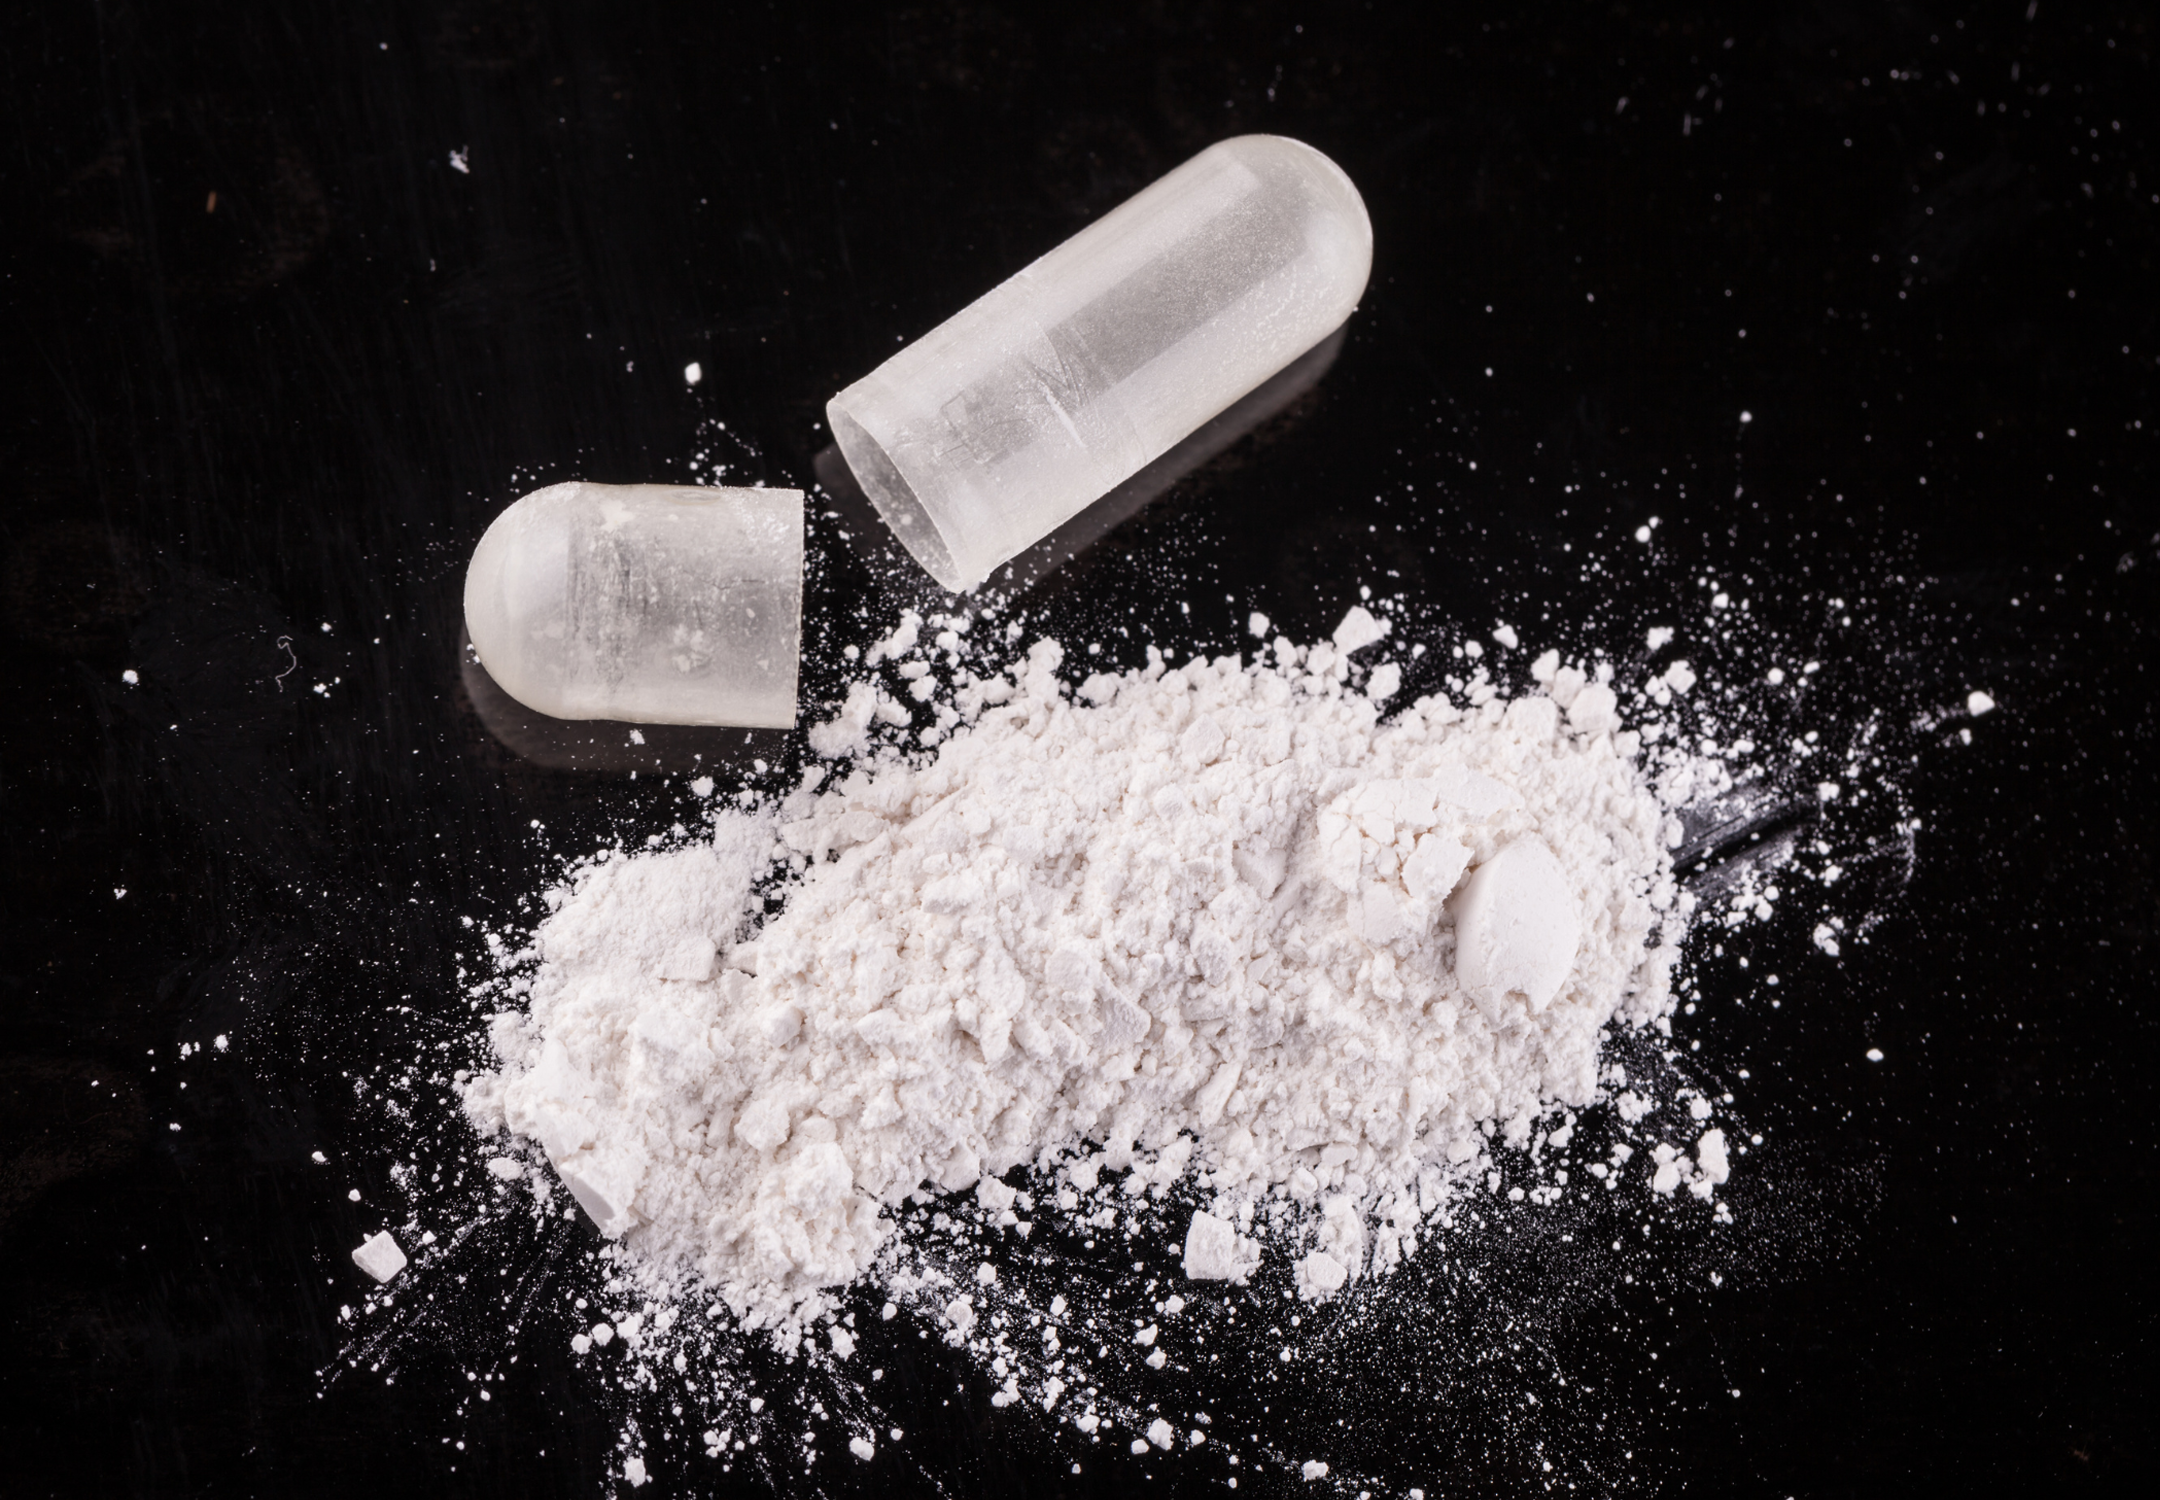
An opened capsule of creatine powder
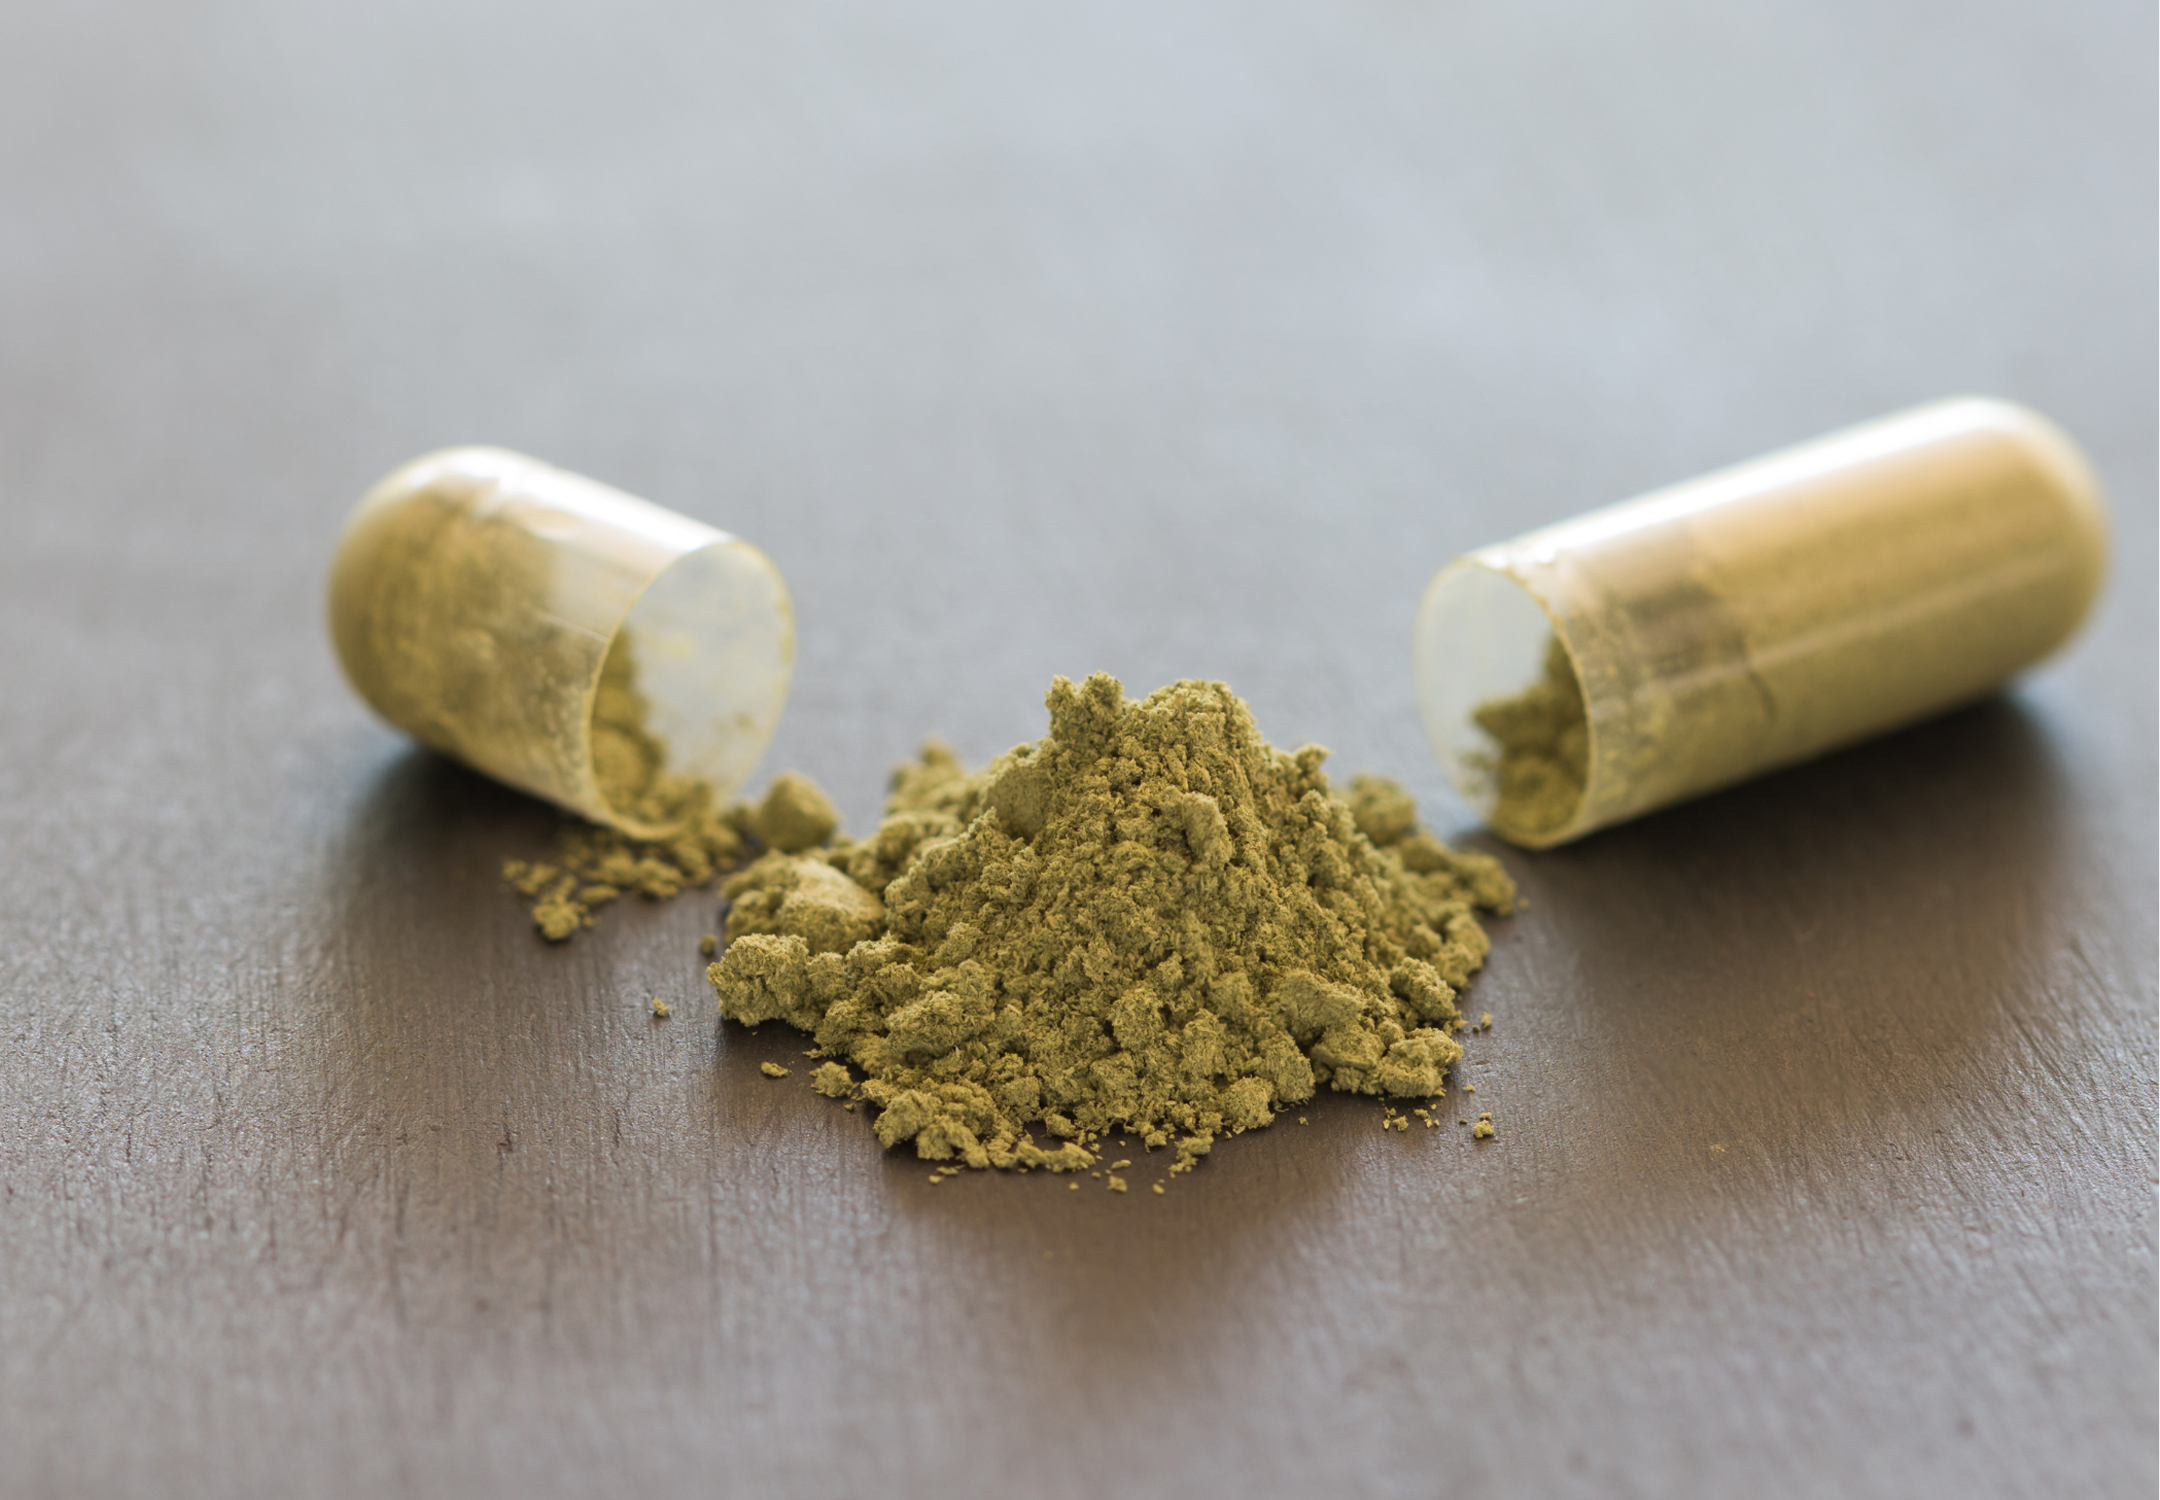
An opened capsule of kratom powder
For example, if you filled one size 00 capsule with as much creatine as possible, and then you fill another size 00 capsule with as much kratom as possible, the size 00 capsule with creatine would be holding about 1100mg of creatine powder, while the kratom capsule would only be holding about 500mg of kratom powder.
This is because creatine powder is typically very fine and dense, while kratom powder is a ground up leaf, making it a much lighter yet thicker powder.
You shouldn’t worry though, there’s a very simple way to know exactly how much powder you have in the capsules you’ve filled.
You’ll find that later on in this article under the section titled “Calculate Your Pill’s Dosage: How Much Powder is in Each Capsule.”
Now that you’ve learned the capsule basics, we’ll show you the best ways to fill your own capsules, and what you’ll need for each one.
If you need help choosing what supplements to take, where to get them, and even how to mix multiple powdered ingredients into one capsule, you can learn all that and more by reading our article The Ultimate Guide to Making Your Own Supplements.
DIY Capsule Filling: Single Capsules
Now let’s get into how to fill your empty capsules with your powders.
Filling capsules one at a time isn’t too difficult, but it can be annoying. If you want to fill only a small handful of capsules, the first and main way we recommend doing it, which requires no tools, is the uncap and push together method:
Uncap and push together Method

Filling a capsule with the “push together” method
Pour some of the powder you’re planning to encapsulate onto either a small plate, or into a shallow bowl.
Take an empty capsule and uncap it so that the top is in one hand and the bottom is in the other.
With the center openings facing eachother, push them through the pile of powder and toward each other multiple times, until the large end (bottom half of capsule) is packed as full as possible.
If the top half of the capsule has too much powder in it, pour a little out so that they can be pushed together fully.
Push the capsule together.
Pros:
Doesn’t require tools
Quickest way to fill one cap at a time
Can hold a little more because the top half of the cap is also being filled somewhat
Cons:
Can’t be sure exactly how much is in each one because upper cap is inconsistent
Can be annoying because they won’t press together if they are over-filled
Only can do one at a time
Will get your hands dirty if not wearing gloves
Lab Spoon or Folded Paper pour in Method
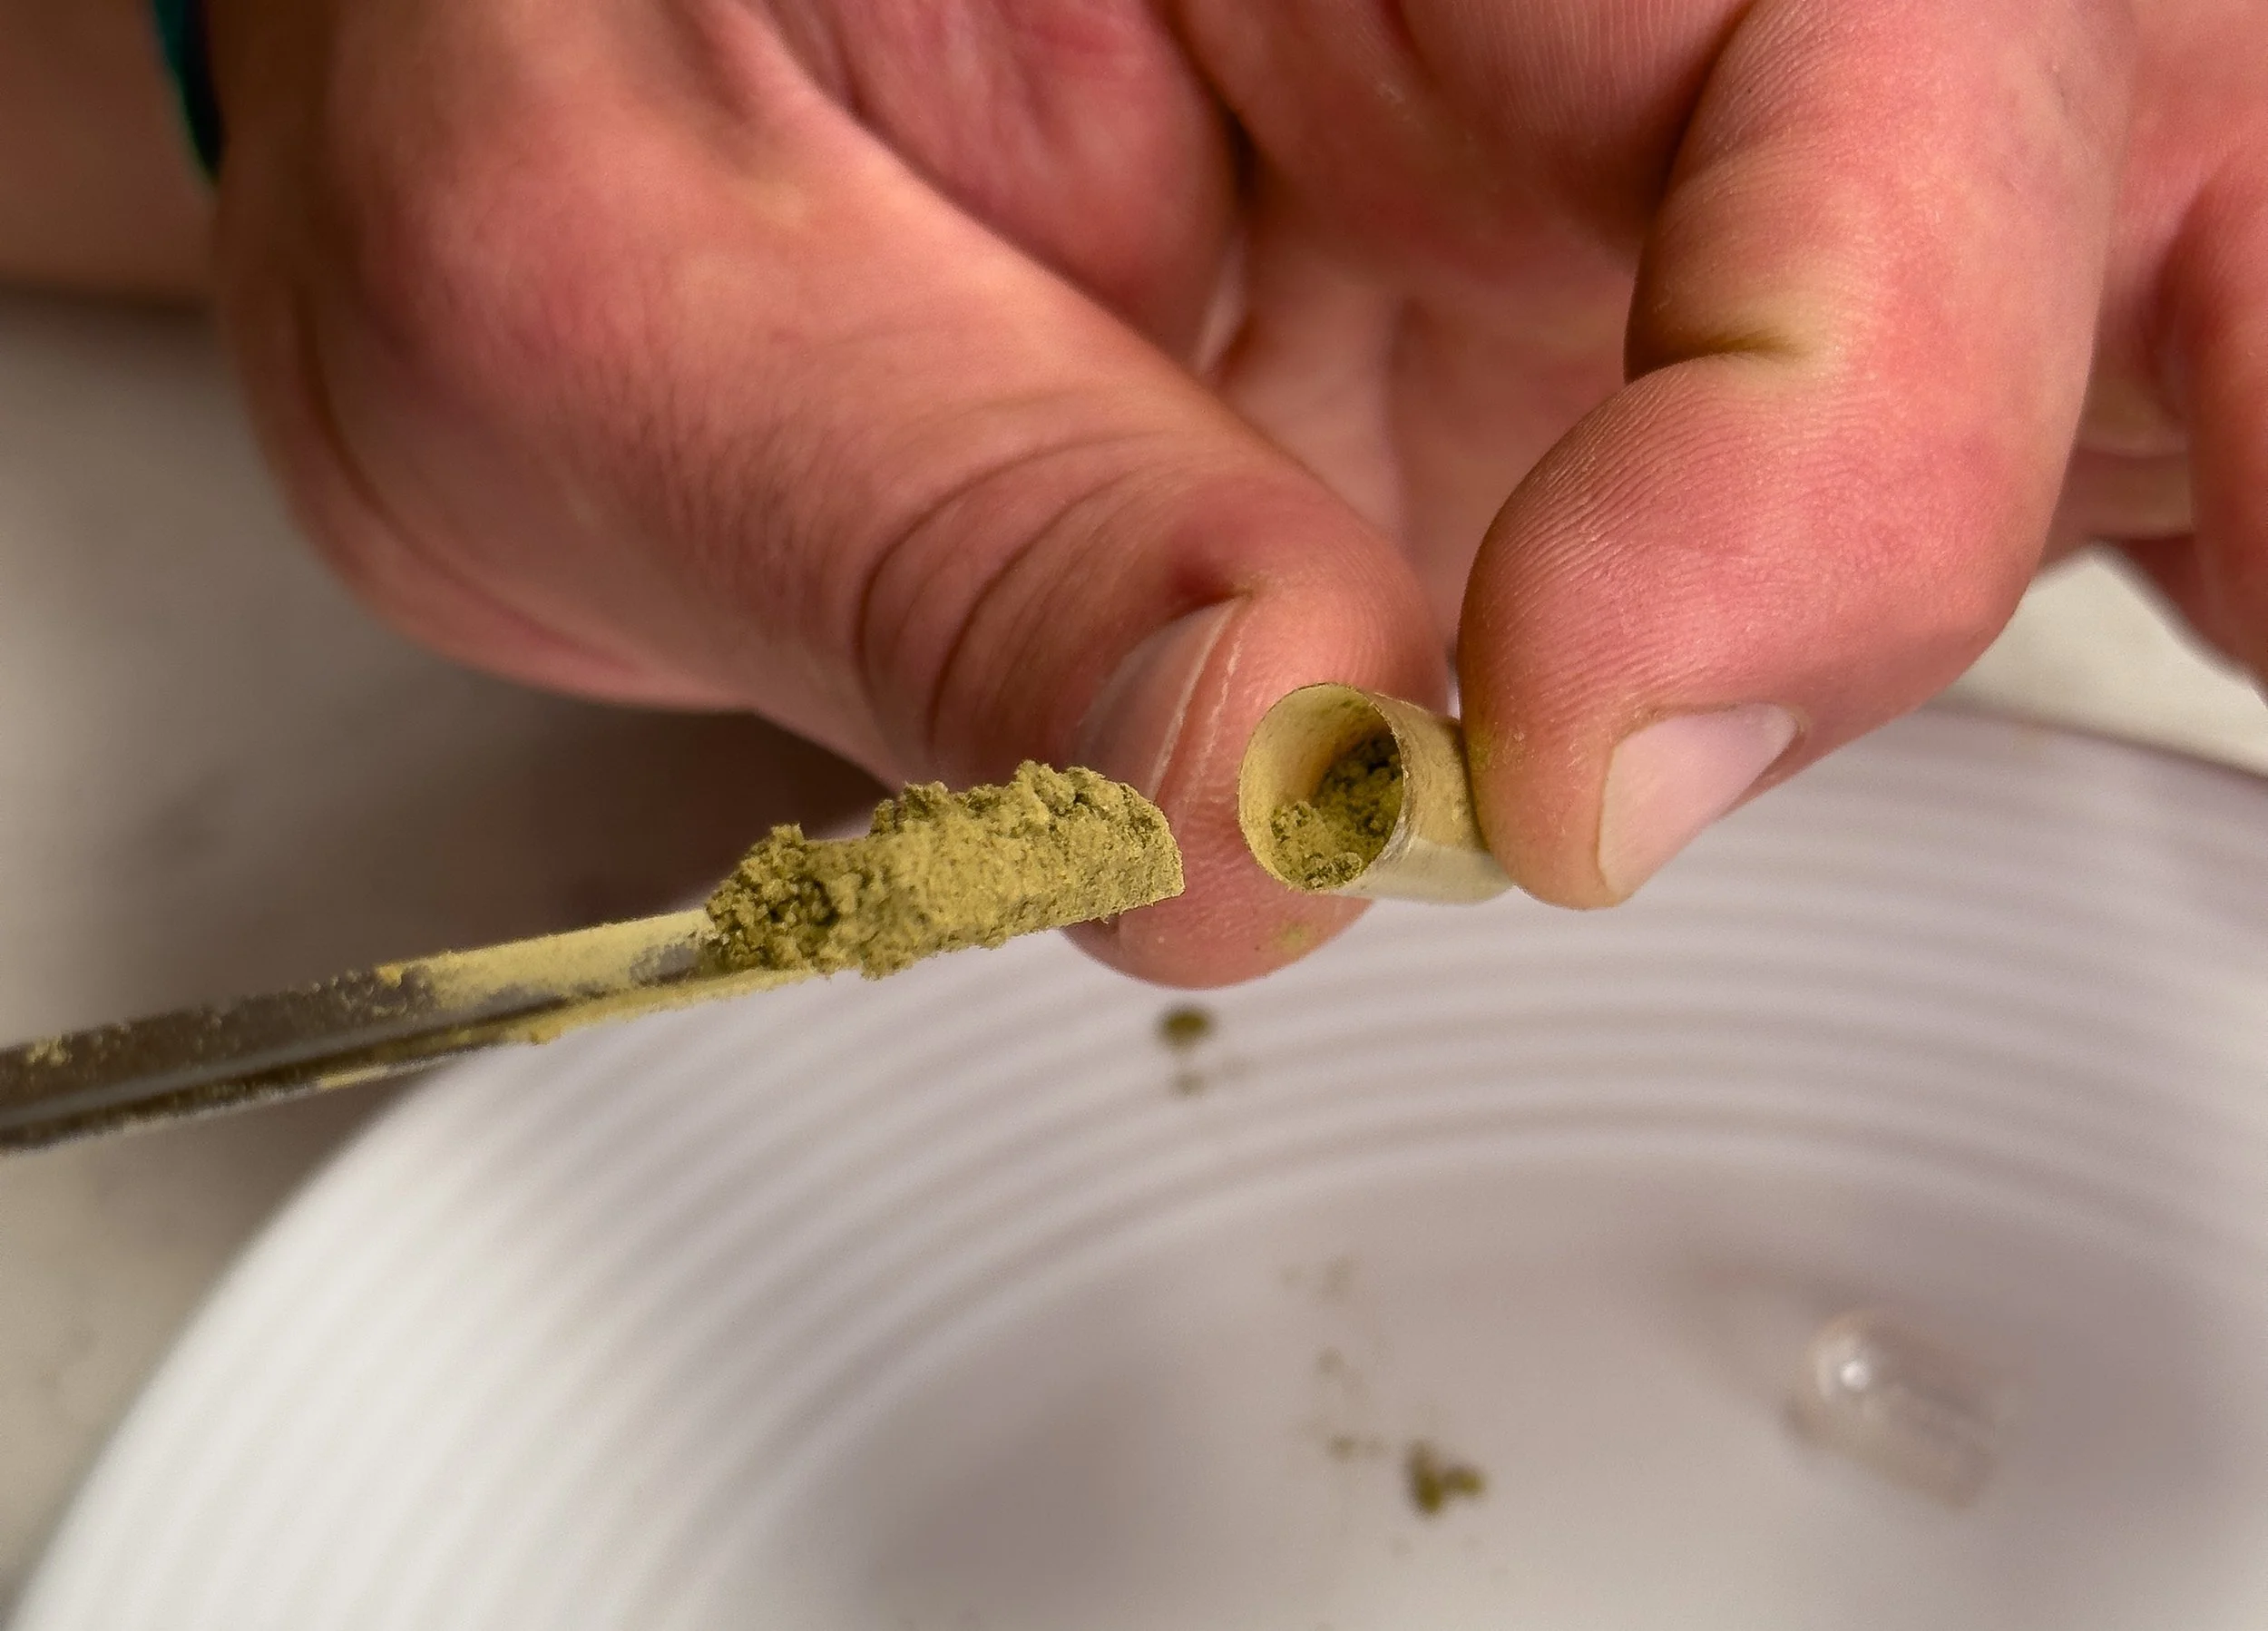
Filling a single capsule with a lab spoon
Pour some of the powder you’re planning to encapsulate onto either a small plate, or into a shallow bowl.
Take the bottom half of an empty capsule and hold it over the bowl with your powder
With the capsule opening face up in one hand, use the other hand to scoop powder with the lab spoon and pour it into the capsule opening. The excess will fall pack into the bowl of powder below it.
If using a folded card or piece of paper, you can either put powder in the crevice of the fold first, and then pour it into the capsule, or use the folded card as a scooper and then pour it into the capsule. A business card folded long-ways works okay for this.
Once the bottom half of the capsule is full, you’ll want to tamper the powder into it to make sure it’s firmly packed.
If your lab spoon didn’t come with a tamper tool, then depending on the capsule size, you can use various cylindrical objects to do this. The the backside of a pen or pencil can work.
Once packed, add some more powder and repeat until the bottom half is fully and firmly packed.
Take the top half and press the capsule together until it clicks into place.
Pros:
It’s easy to ensure a consistent dosage in each capsule by firmly packing powder into only the bottom half
Cons:
Requires tools such as a lab spoon kit, or various objects to be used as such
Time-consuming to fill scoop by scoop with such small amounts
Can only do one at a time
Will get your hands dirty if not wearing gloves
DIY Capsule Filling: Multiple Capsules at One Time
For filling capsules quickly, a capsule-filler machine is the best option. We suggest this 100-hole manual capsule-filling press for the average consumer making capsules at home.
*Important: Make sure to know which size capsule machine you buy, as they will only work with capsules of the same size rating.
So a “size 2” filler will only fill “size 2” capsules. Sometimes those sizes are written with number signs, such as #2" or 2#.
Size 00 capsules and machines are the most commonly used. As we discussed earlier, a size 00 capsule holds anywhere from 1/2 to 1 gram depending on the powder density, yet it isn’t too large or difficult for most people to swallow.
You can also follow along with the steps below while watching our video, how to fill capsules with a capsule-filling machine:
Capsule Filling Machine Method
Separate 100 capsule tops and bottoms into separate bowls (if using a 100-hole machine)
You can save 5 minutes and skip this step if you use pre-separated capsules like these
Put the frame plate on top of the body plate, and pour the 100 capsule bottoms into center of the frame plate
Shake the capsule machine gently so that all the capsule bottoms fall into the holes facing upwards. You can place some in manually if it’s taking too long. If any fall in upside down, then wait until all the holes are filled, remove the frame plate, and use the lab spoon to pull them out and flip them over.
Remove the frame plate from the body plate and place the powder spill guard on top of the body plate
Pour your powder on top and use the spreader to spread it evenly into each capsule
Use the tamper tool to pack the powder down firm into the capsules, and then use the spreader again to spread the powder in. Optional: You can tamper it and spread the powder one more time if the powder still has room to fit.
Scrape the excess powder off back into its container, then remove the spill guard, scrape the rest off, and put the body plate with filled capsules to the side.
Take the capping plate and place the frame plate on top of it.
Pour the capsule tops into the center of the frame plate, and gently shake so that the capsule tops fall into the holes. As you did in Step 3, ensure all the capsule tops fall in or are hand-placed in facing upwards. If any fall in reverse, remove the frame plate and use the lab spoon to pull them out and flip them over.
Remove the frame plate and place the middle plate on top of the capping plate. Ensure that the middle plate had the indentations facing upwards to the ceiling.
While holding the two plates together, flip them over and place on top of the body plate with the filled capsules.
Press down firmly and evenly a couple times. You should hear sounds of the capsules snapping shut.
Lift the capping plate and you should have 100 fully-filled capsules. Pick up the middle plate and flip it over, all the capsules should fall out.
Clean and dry all capsule machine parts that touched the powder.
*You can see a full color PDF with these directions and pictures to follow along with here
Calculate your Pill’s Dosage: How Much Powder is In Each Capsule
Once you’ve filled your capsules, you’ll want to know their exact dosage strength. You can find this by weighing them out in grams/milligrams.
This requires the use of a digital powder weighing scale.
Follow this simple procedure:
Place 10 empty capsules on the scale tray-top to find their weight
With the empty capsules still on the scale, press the “tare” or “zero” button to zero out the weight
Remove the 10 empty capsules and place 10 filled capsules on the scale
Take the total weight of the 10 filled capsules and divide it by 10
This is the amount of powder that is in one capsule.
For example, if the weight of the ten filled capsules was 7 grams, that would mean there is 0.7 grams in each capsule, which is 700 milligrams.
Please note that the instructions above help you find out how much of a powder you’re able to fit into a capsule. But if you want to make sure your capsule has a very precise amount of the ingredient you’re filling with, watch our short 2 minute video: How to Make Capsules with Exact Dosages.
Storing Your Own Filled Capsules
After filling your capsules, it’s important to store them properly so they stay fresh and effective. Here are some helpful tips for how to store them:
What kind of container to use

Wide-Mouth Amber Mason Jar
Using an airtight container for your capsules is the best way to prevent any exposure to oxygen, which can degrade the ingredients over time. Glass jars with tight-fitting lids are a great option for storing capsules, or even whole supplement powders in general.
We prefer “wide-mouth” tops, as this makes it easier to fill or take your capsules and powders from them.
But if you want to take an extra step to protect your capsules, using amber glass jars is even better because they protect the contents from light which can damage the ingredients.
Light can cause a process called photodegradation, which can break down the effectiveness of the ingredients over time. Amber glass jars block out the majority of visible light, which can help to preserve the potency of the supplements.
*Interestingly, if you visit an apothecary and notice they’re using amber jars… that’s a GREAT apothecary! On the other hand, it’s also nice to be able to see the contents if they use clear glass jars. But for optimal effectiveness, low oxygen and low light storage is best.
If you don’t plan to use your supplements for a while, you can also add in oxygen packets to increase their shelf life, or use a vacuum sealer lid/food saver for the same effect. This is similar to how bartenders pump the oxygen out of the wine bottles at the end of a shift to keep them fresh for longer.
Where to store your capsules
It is important to find a cool and dry place to store your capsules, away from light and moisture. The ideal place for storing supplements would be a pantry or a cabinet, avoiding areas like the bathroom or anywhere in the kitchen that may have high humidity levels.
It is also important to keep them out of reach of children and pets, as some supplements can be harmful if ingested in large quantities.
Other Best Practices for storing your Supplements

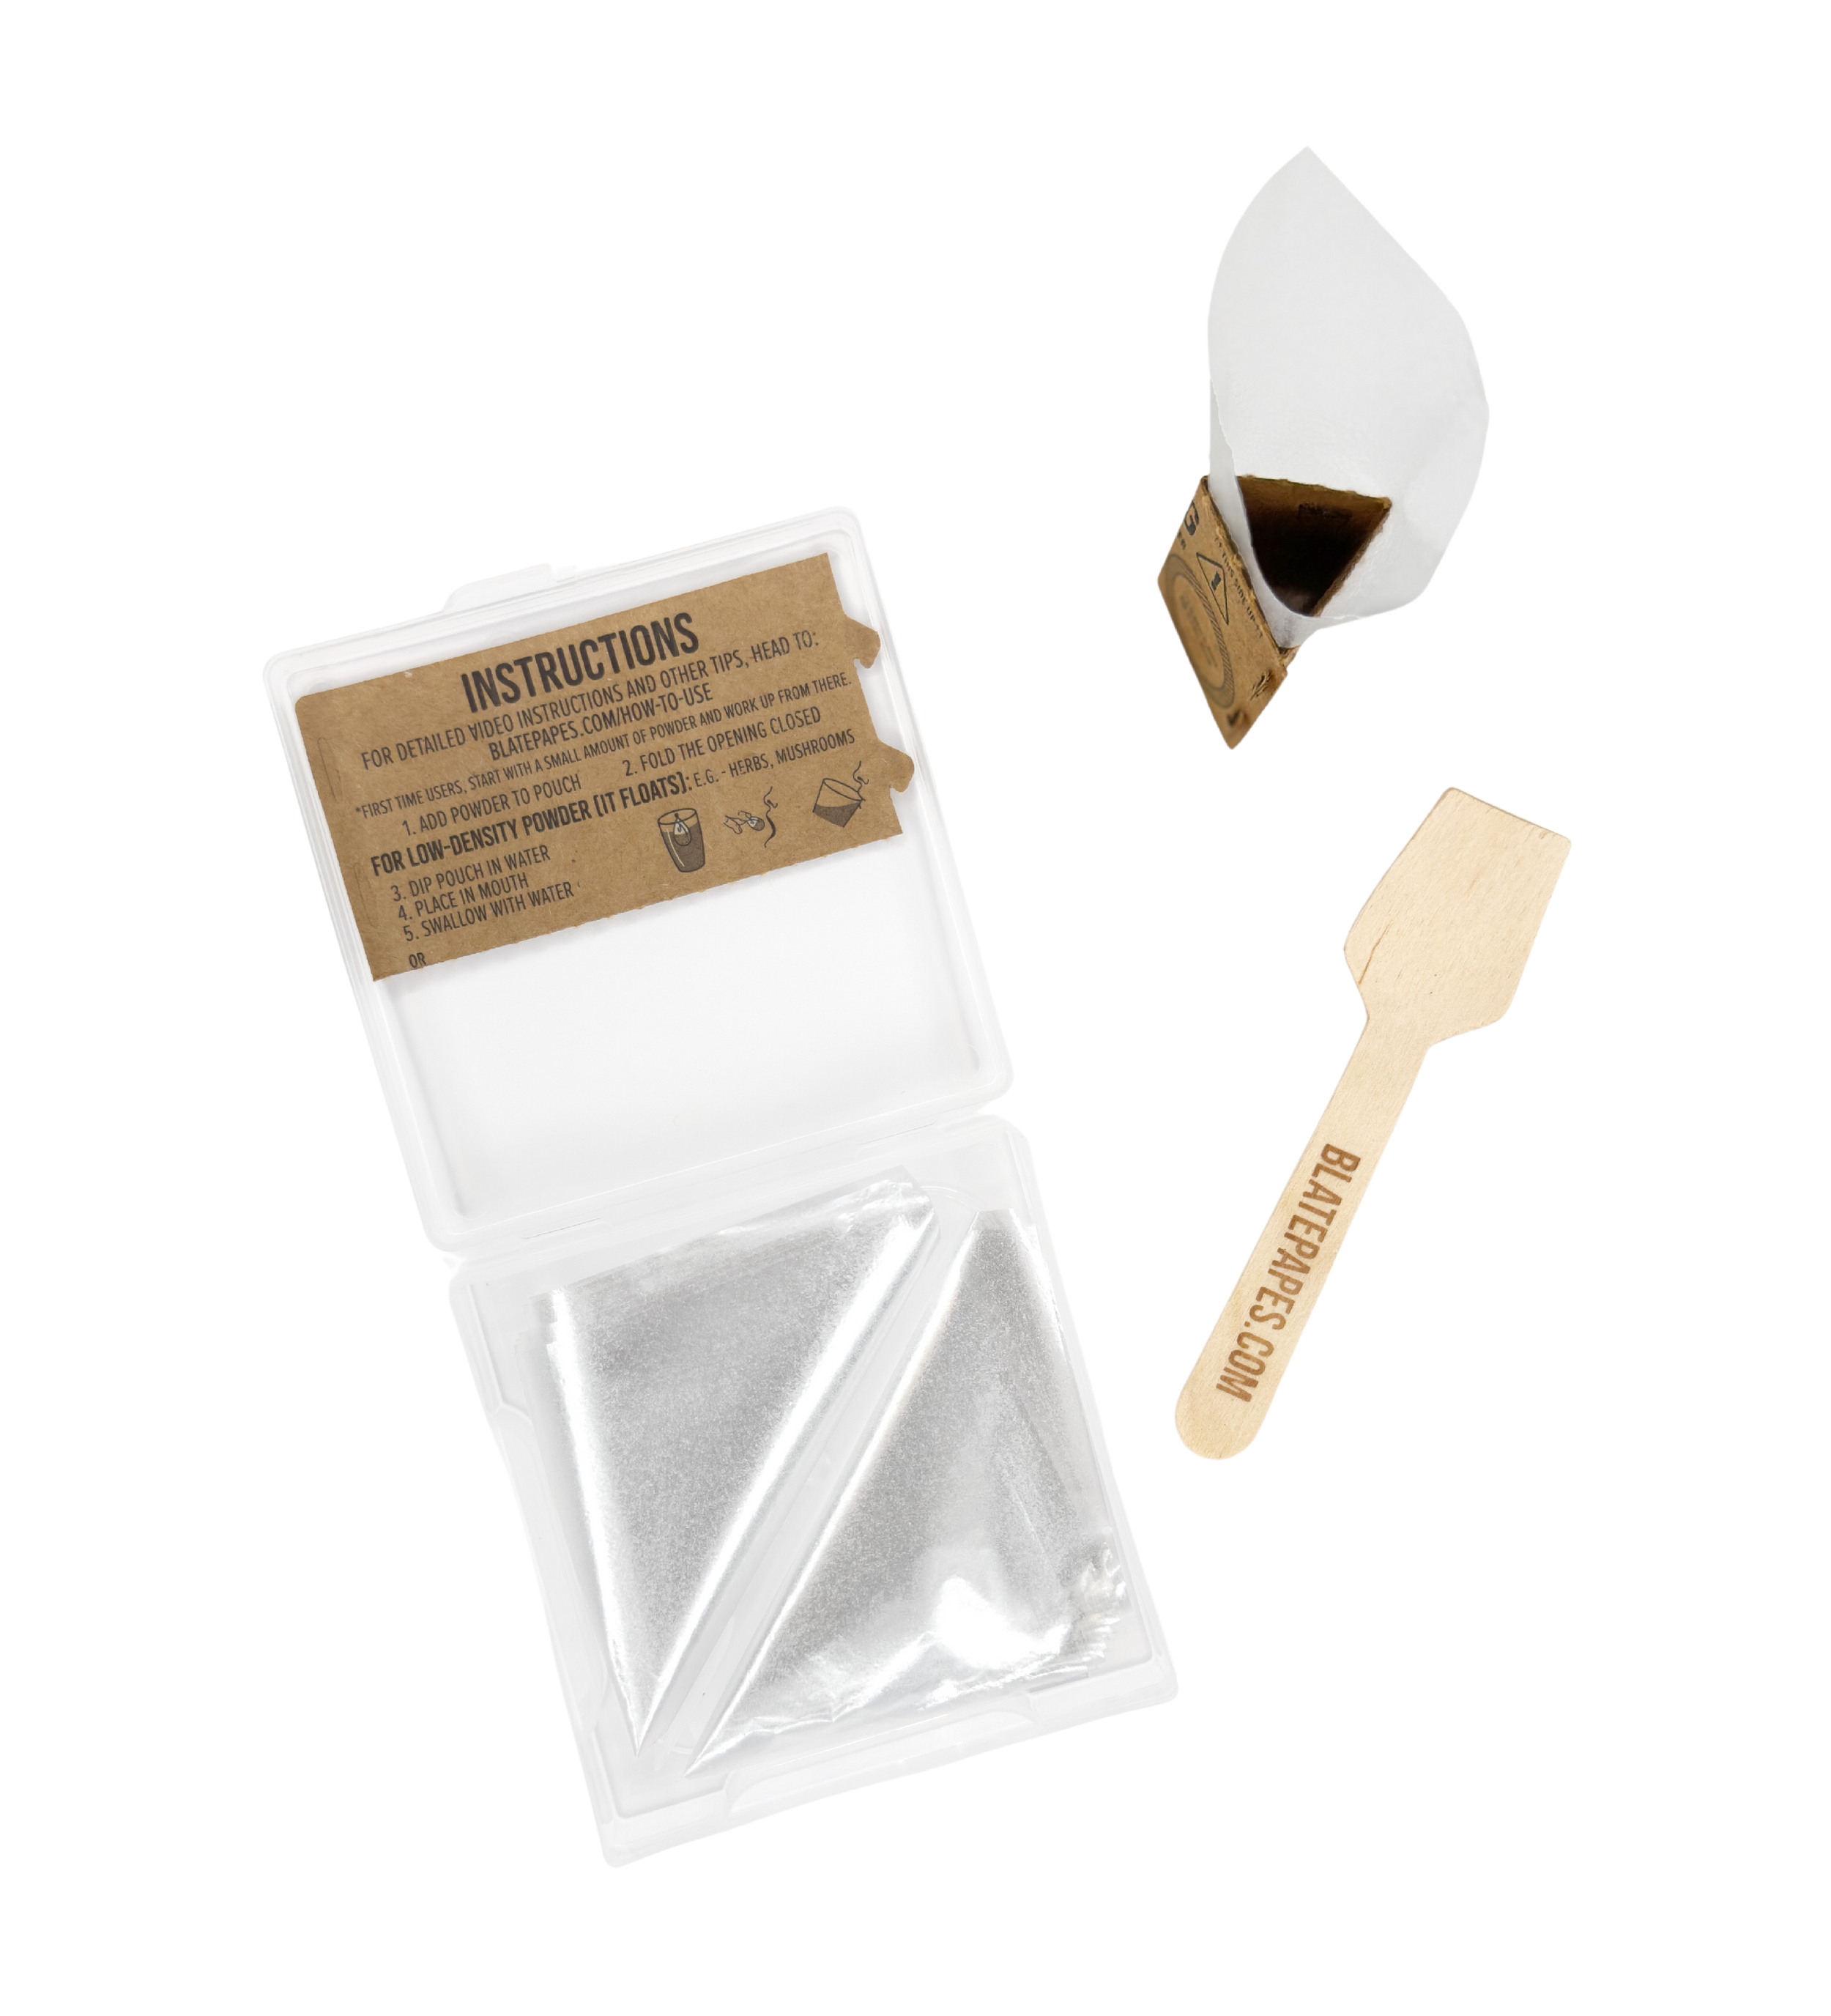
Dipping an Edible Gel Film Pouch Before Swallowing
Labeling - It’s a very good idea to label your container with the name of the supplement, the dosage/strength per capsule, the date you filled them, and the expiration date (if you know it).
Freshness Checks - If you stop using them for a while, check on your capsules every few months to make sure they’re still fresh and haven't expired. If you notice changes in the color, smell, or texture of the capsules, it's best to discard them and make new ones.
By following these tips, you can make sure your filled capsules stay fresh and effective for as long as possible.
Other Options: Using Edible Gel Films to Take Your Supplements
If you’re filling capsules and making your own supplements, you might also want to know about edible gel films. Like capsules, edible films (such as Blate Papes) are also used for swallowing powders.
They’re a clear edible film made of non-GMO potato starch and water. However, because they turn to gel when dipped in water, you’re able to swallow more powder easily and have it kick in faster.
They’re very popular for taking bad-tasting supplements and botanicals like kratom.
To see how you would use them, watch our instructions on how to use edible films.
More Help with Making Your Own Supplements
If you’d like more information on making your own supplements, you can read our full article on how to do it or watch our 14 minute video that teaches you everything you’ll want to know about making your own supplements!
To see more on the type of tools available, watch videos in the BlateCo store showing our capsule-filling machines from the consumer level up to the professional industry level. Some of which are made fully of metal and separate the capsules for you!
And if you have any questions on the content above, don’t hesitate to leave a comment. We’re happy to assist anyone that’s looking for help!
Previous
Previous
Capsule-Filling Machines Banned from Etsy
Next
Next